Saturday, June 30, 2007

ACW Fire and Fury - Petersburg

Figures: 15mm from several manufacturers.

Rules: Fire and Fury

These rules are a club favorite, they enable you to fight large battles in a short time . They are no longer in print, a real shame as they are really fun to play.
Basing: Four figures are on 1"x1" square bases, 6 to 10 bases make up a brigade. Two to three brigades make up a division. I only wish I had a copy of these rules. They can be used for any horse and musket period.
To move each brigade the player must roll a D10 to see if the brigade moves and the distance it can cover. Units wheel up to 45 degrees with a maximum move rate of 12" for infantry. 18" for cavalry and 8" for artillery. Leaders are rated from poor to excellent and can effect movement and melee rolls. If a unit is in disorder it has a different movement chart, but can rally as part of its movement.
Fire combat is based on the number of stands and the distance involved. Artillery has a devastating canister shot of 10 points, when combined with infantry it is very lethal.

Game Report5 Union players against 3 Confederate players

The Confederates were to hold the Union forces off and prevent them from reaching the town. To start off with the Confederates had 2 infantry brigades with 1 artillery piece in a redoubt and 2 Cavalry brigades with 1 horse artillery piece deploying freely. The Union was to randomly enter on 3 roads from the opposite roads. As you can see there was a lot of ground for the defenders to cover .


The defenders get a defensive bonus, fire combat rolls at a -2 against the redoubt, in melee the defenders get a "favorable ground" modifier. It seemed a logical choice to place the infantry as the Confederates would be out numbered. If they could weather the Union storm there would be hope.


Here come the "Blue bellies"marching in column on a road toward the prepared defensive positions. It would take a couple of turns to reach small arms fire so the Union troops would be in column as long as possible.


More and more Union troops in the advance. The confederates were hoping the Union troops would bottle neck by entering more troops on a single road but it did not happen. The Confederate horse artillery would fire off a few long range shots in hopes of slowing down the enemy. They cause some disorder but it was little effect.
Finally the Confederate reinforcements arrive. AP Hill starts to enter, hopefully he is not too late. The rebels need to reinforce their left flank and establish defensive positions in their center and right flank. The Confederate units are smaller but are better quality.


Union cavalry are excellent troops when dismounted, they are advancing on the rebels taking a few casualties along the way. As they got closer they were greatly reduced in strength.
The rebels get help on the left flank, the red marker is used to show low ammo. The Union troops are preparing for an advance followed by an assault. The white marker is used to show disordered units. Eventually these troops would make a desperate attempt to attack the Union troops by coming out of the defenses.


Here is a close up of the Union troops massing in the center for an assault. I wanted to show the detail of these excellent figures painted by Alan and Jim C. It looks like hand to hand combat will be the preferred offensive strategy.
Confederate forces arrive to match the Yanks in the center.
Here is a birds eye, the Union is on the left, Confederates on the right.
Her is the Union advance from their view of things. You can see the Division Commander is controlling his 2 brigades and artillery. The guns must be deployed to soften the defenses. The unit on the left is in line, the one on the right is in column. The column formation gives you a +1 to your movement roll.
More columns of troops advance on the Union left, there is no shortage of troops for the North. Those Yanks breed like cockroaches, or they could be newly arrived from foreign lands. Welcome to America, here is your rifle , now head south.
A mistake made be the Confederates is that we did not deploy a brigade in support of another. The Union moves in force. Fire combat and melee in the center. The Confederate player (my son) rolled poorly, the Union decimated the center of the line in the opening stages of the battle.Confederate cavalry moves to attack the center with the aid of infantry. The Union troops were repulsed , but with out loss.... a common theme. The South just couldn't roll well at the critical moment in the center of the line.The Confederates pull a risky maneuver by assaulting artillery on their right flank, as you can see the south is in a pickle. The North's guns were causing havoc, so they had to be dealt with. The first battery fell, a break through charge took out a second battery. After that the infantry was left unsupported against overwhelming odds.Wave after wave of Union troops assault the center. The South could not hold on much longer. Confederates are disordered, the Union advance moves steadily forward . AP Hill is giving orders to hold, the Union die rolls really did the south in. If you roll poorly you can't pull off a win no matter what quality you troops are. The Union juggernaut rolls forward, the Confederate right flank ceases to exist and the game was called.

Recap: The game lasted just over 3 hours. A Union victory was the final result. A blessing and a curse our club has is that we play different rules every game, so I constantly make rookie mistakes when playing.... but we have an endless variety of periods and battles so no complaints from me.

Tuesday, June 19, 2007

Sudan Campaign - Akasha

The Battle of Akasha has taken place on the 4th turn of the campaign. Egyptian forces have moved south again as they fight their way to Khartoum. The Egyptians have had a run of luck beating back every assault from the Mahdi. They have now encamped at Akasha and have awakened to the sound of the sentries calling the alarm.

As you can see the dervishes have started very close to the perimeter but they are spread outmaking a consolidated attack difficult. The Egyptians are surrounded but get a defensive bonus that proved very critical in the fight to come. If the dervish break through they can kill any wounded they come in contact with which would cripple the relief effort, they must hold at all costs.

The dervish cavalry was held to punch through at a critical moment when needed. Here we see camels employed to support an Ansar advance against the southern facing of the camp.They were part of 3 tribes attacking the one area. They are good troops but against fixed defensive positions they had a hard time.

The Egyptians are really in the thick of it. The camels are pushed to the breach as the Egyptians put up a steady fire. A mass attack of Ansars is also stretching the defenders to their limit. The Egyptians had to shift their defenses to close the breach.


Wave after wave of Ansars attack, the fighting has resorted to hand to hand combat. The very survival of the relief column hangs in the balance. The +1 modifier for defending the terrain proved to be the crucial factor. The dervish infantry just couldn't pull off the deciding blow to break the line.
The Naval Brigade was positioned on the North side of the camp. It did not see much action as it it would be too dificult for the dervishes to deal with. The gun would eventually be repositioned to repel Mahdist rifle units in the eastern hills. A very effective weapon to eliminate waves of crazed tribesmen.


Egyptian infantry started taking casualties, the wounded and dead begin to pile up. The Egyptians managed to hold on as the Ansar could not deliver the death blow to their enemy. This battle proved to be the turning point of the game. The Ansar did not take many casualties, they were pushed back by the Egyptians. They had trouble rallying to go at the Imperial dogs once again.


The camp was saved , the last few dervish units skirmish to cover the retreat. Once again the Egyptians have defied the odds and beaten an enemy many times their number. It looks like the Egyptians will beat the British to Khartoum, unless something goes terribly wrong, but what are the chances of that?


Now it's time to count the dead and wounded, the Egyptians are slowly being eroded away in a game of attrition. The Northern district is being handled well, but the real test lies further south. Since the southern district has a higher revolt index there should be considerably more Mahdist tribes rising up to repel the hated infidels. Now on to turn 5.


Monday, June 18, 2007

Sudan Campaign - Suakin

Suakin was another battle in our campaign. It had been under siege and supplies were running low. The city is key for one reason, it is the only port outside of Egypt that can receive reinforcements. Troops from India are currently enroute, so the city had to be saved. An infantry company of Egyptian infantry was sent to aid in a break out attempt.
A you can see the Egyptian defenders are manning the walls, there are only 2 roads of escape behind them. Should they flee there is no guarantee they would be able to reform on the far side of the river. The defenders were bracing them selves for a massive attack.
This is indeed the thin white line. In the background you can see the main attack as a large contingent of dervish tribesmen charge the defenses. In the foreground is the feint to keep the defenders in place. If they can keep the Egyptians from supporting their other company then the dervishes have a chance.
Now is the desperate struggle in brutal close quarters fighting. The fate of the town came down to a single die roll, if the dervish wins it they will have broken through the main lines and seized the town. The Sword and the Flame at its finest.
The Egyptians held and are now counter attacking the dervishes who begin to flee. Suarkin has held and is able to receive troops arriving from India....and there was much rejoicing. At this point the Egyptians had won 3 in a row, a pretty good run of luck. I wonder how long it will hold up. Now the campaign is at turn 4 and another battle awaits. Egyptian troops continue south to Akasha where they must fight to regain the town. They are becoming fewer in number.

Sunday, June 17, 2007

Sudan Campaign - Wadi Halfa

This battle took place on the third turn of the campaign. The town of Wadi Halfa, although it was only worth 5 points, was key as it is required to establish a rail line to help speed troops south. The Mahdist forces captured the town and was using it as a strong point in the Northern district. I remember this as the battle of the Allah'mo.


Here the Mahdi defenders were on the walls to repel the expected counter attack. The defenders had few musket or rifle units, so closing with the enemy for hand to hand seems to be the best tactic.


Egyptian infantry starts off across an empty field. Although the dervishes are not the best shots, they are sure to lose a few infantry. he Egyptians are well trained and led so it will be difficult to break them during their advance.


The Egyptian infantry advanced across the field and have scaled the walls with the help of supporting artillery. In this picture it is good old hand to hand. More dervishes wait below for their chance to close with the infidel dogs. The dervish artillery is manned by a captured crew of non-believers, if they do not fight, then they die.


Egyptian cavalry advance too close to the main gate and are rushed by frenzied natives. The cavalry easily evaded the onslaught thanks to phased movement. The dervishes realized they could not catch the cavalry and had to dash back into the fort.


Due to bad rolling during combat the dervishes lost the west wall. The Egyptians were now ready to fire at close range and clean up the town, although there were much less troops then what they started with. This particular company of infantry lost most of their company and will be hard to replace for future battles.


Boats can be seen approaching the Northern wall, they are loaded with Egyptian troops preparing to storm the North wall.
It looks bad for the Mad Mahdi's forces, the Eastern wall and half of the Northern wall have fallen. Now disciplined fire will rain down on the defenders of the faith. The Northern wall was taken at a high cost. How will the Khendive of Egypt replenish the ranks as the rebellion is at its peak.


The dervishes hold up in their last corner of town, the only thing they can do now is take as many infidels with them as possible before they break out to the open desert.

It was another victory for the Anglo-Egyptians. It will be interesting to see how much longer they continue to push on before the losses add up. At this point the Egyptians do not seem to need the British troops headed for Egypt.

Saturday, June 16, 2007

Sudan Campaign - El Obeid

Our club is currently involved in a Sudan Campaign using the rules set The Sword and the Flame and will last throughout the year, it started in March. Luckily, I game with veteran players (some more than 20 years' experience) who have accumulated vast amounts of beautifully painted figures from Foundry, Old Glory and several other manufacturers too numerous to mention as well as eye popping scenery. So here is an era where there is no purchase necessary and the only limit to the battles is in relation to thesize of the game table (12'x6'). Last night we played out the battles occurring on turn 4, but this is an attempt to catch up on what happened in the previous turns.

To obtain the campaign rules please check the SUDAN CAMPAIGN link on this blog.

Currently all provinces are in rebellion as the Mad Mahdi has been spreading the word (and Sword) across the Sudan. Egyptian and Sudanese forces were initially placed through out the Sudan with various strong points. Once the rebellion was under way, many of the small outposts fell with out a struggle(no table top game required) to ambush. Any other forces managing to survive were placed under siege with a limited amount of turns with supply. Khartoum is reinforced with extra infantry companies, artillery and cavalry. If the supply runs out, the defending units surrender....Khartoum is in a desperate state.


The Great Khendive of Egypt has sent relief forces south, but they will need to fight their way to Khartoum the entire way, all of the provinces are in revolt. England is sending help in the form of Guard and Highlander companies, and India has dispatched Cavalry and infantry support as well.


The Battle of El Obeid was the first tabletop game of the campaign. It was a small skirmish played out to get things rolling in the campaign. Egyptian infantry was breaking out away from Mahdist positions in a key town. The game played quick as the Egyptians had to march across open terrain to close with the enemy, it is a bit easier with artillery support.


Old Fuzzy is a tough opponent, in the rules "The Sword and the Flame" they get a bonus +1 to their melee die roll. As a frequent dervish player these are my favorite troops. Nothing too fancy, just close fast and kill. In this game, however, they are on the defense, milling about in the brush waiting for the infidel.


Dervish cavalry had attempted to sweep around the left flank,but they were checked by accurate gunfire. Eventually the Dervishes could not stand against the withering fire of the 2 Egyptian infantry companies. The Mahdist forces left the field and the Egyptians survived to fight again.... but as the revolt grows, so does the number of Dervish forces available for another skirmish.


A critical piece to the campaign system is that losses to Anglo-Egyptian infantry companies are very difficult to replace. If the player decides to fight to the last man and the unit(s) are wiped out, then that force is not available for the remainder of the campaign. Losses taken by the Allied player continue through to the next turns. So if a 20 figure company looses 10 men in a battle, then there is a chance that only 10 men are available for the next battle. So Allies must be cautiously aggressive in their approach. The Dervish/Mahdist forces have no worries about attrition. They may continually fight to the last as the number of units is dependent on the revolt number of the district and a die roll. A higher index and a lower die roll means lots of dervish units....very replaceable units at that.

Saturday, June 2, 2007

Rapid Fire France 1940

I ran a Rapid Fire Game set in 1940 France. The Germans were to attack and the French were on the defensive. Victory conditions were set so the side holding more buildings than the other would win the game. There was a farm complex with 3 buildings and a small town with 3 buildings. I have been collecting and painting these armies for 3 years and it was great to finally see them on the table. We had 7 players , Jim F. , Kyle, Chris, Steve, Jim C., Jack and Al.

THE RULES: Rapid Fire 2

OVERVIEW
The rules are simple and play very fast which is helpful in larger games. We had 7 players (3 French and 4 German) and completed a game in 4 hours. The game is designed for 20mm figures but smaller scales will also work. A turn is divided into segments: Morale, Fire Smoke, Heroic Action, Movement, Reserve fire (by opponent in reserve fire mode), Close assault, Fire and Final Move (if a unit did not move in the previous segment). It is a combined arms game st the battalion level and a favorite of the club. They are not high in complexity or detail, making them perfect for large groups with a time constraint or too much beer consumption...right Jim C?

SCALE
A figure represents a squad, so 8-10 figures form a company. A vehicle represents 2-5 vehicles.
A force is usually composed of an infantry battalion, (approximately 48 figures) and an armored regiment around 12 or more vehicles.

FIGURES and MODELS:
Germans:
The German infantry are from SHQ, Battlefield Blitz, FAA and Revell. The Anti-Tank guns and crew are from FAA. The tanks are plastic models I have purchased from Flea Markets and the resin models are from Frontline Miniatures (Pz 38t and half tracks) bought through RLBPS. The Opel blitz trucks are plastic kits from Pegasus, a great model for low cost.

French:
The French infantry are a mix of FAA, Battlefield Blitz and HaT WWI infantry. The Anti Tank guns are from FAA and the vehicles are from Frontline Miniatures bought thought RLBPS, as well as Armourfast (the FT-17's are very easy to put together). The CharB1 bis tanks were from Mathchbox as well as 2 other FT-17 tanks.

TERRAIN:
The buildings are Hovels , purchased from Wargames Inc., fast service and good prices for resin buildings. The rest of the terrain is scratch built.

German OOB:

Armor
4 x PZ38t's, 2xPZII, 1xPZI(Command Tank), 2xSDkfz 222, 2xSDkfz221

Infantry
4 x Companies of infantry (10 figures each) all with MG support.
1 x Command Company with anti tank rifle.
1 x Motorcycle company (8 figures)

Support:
1x75mm Infantry Gun with prime mover
2x37mm Anti tank guns with prime mover
1x50mm Mortar motorized
1x81mm Mortar Motorized.
1xHanomag with 37mm Anti tank gun
3x Stuka Missions

French OOB

Armor:
2x CharB1 bis, 4x S-35, 4xH39, 4xFT-17

Infantry:
4 x Companies of Infantry (8 figures each).
1 x Command Company with Artillery spotter.

Support:
1 x Hotchkiss MG
1x75mm Field Gun
1x47mm Anti Tank gun
1x25mm anti tank gun
1x light mortar
2 x Artillery missions of 155mm artillery

CLICK PICTURES TO ENLARGE THEM


The French started off occupying the town so they had 3 of the 6 buildings in their possession at the start of the game, and spread their armor across the front since they were not sure where the main point of attack was coming from. They deployed half of their armor forward with the rest in reserve to react as needed to the situation.
The Germans started with infantry in the center and most of their armor on their left flank. Their plan was to consolidate their armor and punch a hole in the French defenses.


German Infantry had to cross fields to make it to the farm complex. The fields provided cover to help conceal their movement. A quick advance to hard cover (building) is the key to survival for infantry.


On Turn 2 the Germans were under fire from French Armor , but the managed to occupy the farm house with an infantry company. The German Motorcycle company on the right flank received casualties as they pressed forward into entrenched French Infantry. The French tried to isolate the Germans in the farmhouse but German armor countered the move. As you can see the Germans massed their armor to punch through the defenses. The armored cars lead the way to recon the advance for hidden dangers.


German casualties started to mount as the Armored cars started to receive damage. A French 75mm Artillery piece slowed the German armor but was eventually overwhelmed by fast moving armored cars that survived the direct fire. The infantry in the center pressed on to capture 2 more farm buildings, both sides had an equal amount through most of the game.


Small arms fire from the farm buildings started to take its toll on a company of advancing French infantry. The French tanks were too busy defending themselves from the Flanking German armor. The Germans were pushing through and trying desperately to reach the town.
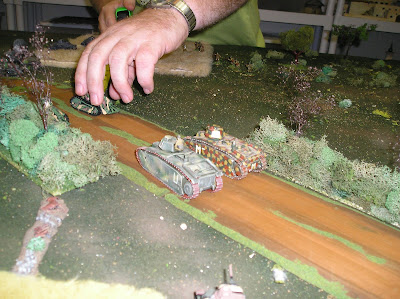
Stukas were attacking French armor concentrations and forced the Char B1 tanks (the best the French had) off the board with a rout result.


French artillery from the spotter took out half of an advancing German infantry company in the center. The German losses were mounting up, but they were very close in completing their flank maneuver. A well placed shot by a French S-35 forced a German Armor detachment (1xPZII and 2xPZ38t's) off of the board.

A failed Morale roll for the Germans (who lost more than 20 figures) meant that they had to leave the field. It is interesting to note that the French also were at the 20 figure casualty mark, and trying to hold on.

Everyone enjoyed themselves and the scenario was a little heavy on the French side, next time I would give the Germans a couple of Mk IV's or MK III's. I would like to take this game to a convention and give it a try as host.

In the 1940 setting, armor must close in and be aggressive, the gun sizes (usually around 37-47mm) are too small for long range tank on tank combat. Tanks need infantry in this era for support, and infantry is also key to occupying structures as well as assaulting them. Combined arms is the key to success. Definitely a different experience from the Panther and Tiger days of 1944 where tanks are lethal at almost all ranges.

Tuesday, May 29, 2007

StarGrunt - Star Wars game

On Memorial Day I had 2 friends come over for Beer, BBQ and a game of Stargrunt. The DAWGS are a great group of people whao share in the common interest of war gaming. So when ever there is a chance to sneak in a game with even one of them I jump at the chance.

Now I have never played Stargrunt so I was interested in the mechanics. The rules can be used for a wide range of eras, I have heard of WWII and modern combat games played with the rules so I was curious. The rules based on dice adjustments, so the more effective the group the higher the die type, i.e. a 12 sided die is the best, a 4 sided is the worst. A defender may have a base die type of a D6 but in cover he would roll a D8.

Rules: StargruntBasically you have 5 types of dice, a D4,D6, D8, D10 and D12. To put it simply you roll your dice against your opponents roll, the higher rolls win. Attackers roll up to 3 dice , one for quality type, one for squad weapons and one for support weapon, so an attacker may roll a D6, D8 and D10 in a single roll depending on several factors The range band is determined by the quality die type, so a D8 die type quality has an 8" range band, aD10 die type qulity has a 10" range band, etc.

The defender starts with a D4 and adjusts up in the die type by the number of range bands he is in and cover modifier, he then rolls a single die against the attackers Example: a D4 target in the second range band is a D6 defensive roll in the open, if in soft cover he has a D8 roll.

Determine the number of Hits:The defender must roll higher then the attacker and beat all of his dice rolls with his single die roll. If the defender rolls lower then add up the value of all of the attackers dice and divide by the defenders die type to determine the number of hits.
Example: the Attacker rolls a D10 = 9, a D8 = 7 and a D6 = 1, the defender rolls his D8 = 2, tha attacker won so add up 9+7+1 = 17, divide by 8 = 2.1 rounding to a 2, for two hits.

Determine the hit results:
Now roll weapon impact vs armor, so a Rebel blaster D8 vs a Stoormtrooper Armor of D8 means both sides roll a D8, the higher roll wins. If the attacker wins then a wound, kill or Suppress result is determined by how much you beat the defender by.

Each squad activates with 2 actions and a squad can perform several actions but can only fire once in a turn. A commander can use his 2 actions to activate a squad by passing a command roll, even if the squad has taken its actions that turn, but if the command roll has failed, then the commanders turn is over.

Figures: Star Wars miniatures by Wizards of the Coast

The figures are inexpensive, pre painted to a medium to good standard, and already based. Alien races can be used in any SCI FI game and are 28mm in size so the match well with most lines. They are proprtioned accurately and a bit slim compared to other 28mm like Pig Iron or EM-4.


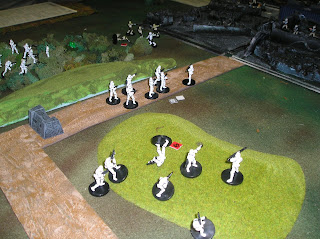
So the game was set up with the Rebels defending a communication station and the Imperial players trying to destroy the communication station before a transmission was sent. The Rebel forces were deployed around their Comms center, a unit of Imperial scouts was close by hidden in bushes and scrub reporting on the situation. On Turn 1 the Stormtroopers entered in their subtle camouflage of brite white armor, perfect in the dark green and charred black environment. The Rebel squad sees the Imperial troops come running up the road in their predictable frontal assault.


Han Solo is in the rear with the gear and issuing orders to move troops more quickly. All troop types had difficulty in the terrain and bad rolling for combat moves did not help, rolling a D6 x2 = the inches you can move , so a 1 result means a 2" move.


At this point the Stormtroopers start to enter, the most forward deployed Imperial troops are a squad of scouts that have been deployed forward to report on enemy movement. So the Rebel player and Imperial player alternate moving squads until All of the squads have activiated on both sides. At the end of Turn 1 there are 4 units of Stormtroopers and a command squad on the board. The Imperials know they must close fast as they have open terrain to cross to reach their objective.


The Imperials fire as they advance losing a few troops along the way and hitting nothing, the gang that couldn't shoot straight, just like in the movies. To relieve pressure on the Stormtroopers the Scouts decide to move out and draw fire,and they make it to the rubble losing only one trooper to a hail of laser fire.
Finally the Imperials have anchored their flank, but the Rebel forces continue to shift the reserve around waiting for Imperial reinforcements to arrive on the flanks. There are 4 squads of Stormtroopers in reserve waiting to enter at a moments notice.


Now in a daring display of tactics we did witness the seldom heard but never seen Imperial Stoormtrooper flanking maneuver. That is right, the Imperial players decided to try tactics instead of marching into an endless stream of laser fire. Of couse General Solo committed troops to check the move. The second ring of the Rebel defense also remained in cover.

Time starts to run short, now the Imperial players know that the shortest distance between to points is a straight line, so the Scouts charge ahead. A wild melee ensues and high tech troops armed with lasers, comms systems and targeting computers result to the basic, beat each other with a big stick approach. Han Solo now is worried, he draws on his reserve and shifts the second ring of defense to meet the new threat. In an unbelievable turn of events the Scouts beat back the Rebel Commandos, but it is too late. Time has run short and the Comms system is activated, the Imperials have failed to achieve their objective.
All in all it was a fun time with friends, the rules are easy to catch on to if you have an experienced player, luckily we had 2 during our game. For Man to man combat I do prefer 5150, but squad level cambat is very fun with Stargrunt.

The next scheduled game is Rapid Fire which is set in 1940 France. Hopefully all goes well and another report will be forth coming.