Saturday, February 25, 2012

Romans and Numidians - Cold War Playtest

Rules: Hail Caesar
Figures:Magister Militum
Scale 10mm

SETUP:
We got together to play test a game for one of our members who is running a game at Cold Wars. The Romans are attacking a Numidian force holding a village at a crucial point by a river. The Romans must seize the village or exit off of the game board.

All Numidian leaders have a Command Rating of 8. All Roman leaders have a Command Rating of 8 except the leader of the right flank who has a Command Rating of 9.


The players
The Players are Chris, Jim, Kyle, Eric and me with Jack (back to the camera) hosting. We kicked off about 7:45 pm with the usual supply of beer and snacks.


The figures are 10mm and have an amazing amount of detail. Jack did a great job of painting them up. The infantry is based on 60mm frontages. We did not convert the scales from 28mm to 10mm for movement or combat purposes.
Turn 1
Roman and Numidian at turn 1
The Romans win the initiative and move out from their starting positions. Most of the troops activate as the command rolls succeed for each division. The Roman light cavalry wins 3 impetus and moves out 36 inches which gets them into position for an attack early in the game. The Roman center advances and faces Numidian elephants and light infantry but they are too far to attack. The Numidian cavalry on the Roman right moves up to fposition themselves for a flanking maneuver on the next turn. The Roman right flank has a unit of Spanish light  and medium cavalry on the extreme flank with 4 infantry units in the center right position.


Turn 2

The Roman left makes progress and disorders the Numidian light cavalry in the first attack of the game. The Numidians are disordered and retreat one full move while the Romans do not pursue. The Numidians had 3 other light cavalry units which outnumbered the Roman cavalry.  In the Roman center the elephants and skirmish troops move up slowly and are too far to engage the slow moving legions.due to low impetus.  Both sides are still too far to use missile weapons.  On the Roman right flank the Spanish cavalry is supported by infantry and another cavalry unit in a cautious advance. The Spaniards aer keeping close to the Roman troops. The Numidian light cavalry gets 3 impetus moves and aggressively towards the Spanish cavalry. The intent was to move past the Spnaish light cavalry but because they are formed up the Numidians had to stop and face them. If the Spanish cavalry were in open order then they would not have been able to stop the sweeping move around their flank. Basically "Units in other formations ca ignore enemies in open order when it comes to the proximity rule" (page 34). I am glad I was formed up and that is an important rule to remember when putting light troops on the extreme flank; but there are now 4 Numidian cavalry units threatening my flank. 


Turn 3
Roman left and center
 The Roman light cavalry moves up for a missile attack on the Numidians at the left flank. The Numidian cavalry is peppered with missiles from the Roman light cavalry, but there were no hits in the attack. The Numidians charged in their turn and the first melee of the game begins. Neither side had supports and the result favors the Romans as the Numidians are disordered after receiving some casualties. The Roman light cavalry does not pursue as there are more Numidians than Romans; there was a fear of rolling poorly on the command roll and stranding the Romans far in front of any support. The Roman center moves up and countered by the movement of Numidian Elephants and light infantry. The Numidian medium infantry is held in the rear near the village and not committed in hopes of softening the legions with light troops and elephants. On the Roman right flank the Spanish cavalry moves up with the support of Roman infantry. The Numidians attack on an initiative move bt fail to get support from a result on a poor command roll. The Romans get an extra 4 dice from the supporting units and that made all the difference. The Numidians take 5 hits and roll very badly in the break test. The Numidians flee the field and the Numidian players rethink the flanking strategy. The rest of the light cavalry pulls back and reforms a defensive line.

Roman right flank turn 3


Roman Center turn 3

 Turn 4
Positions at the start of turn 4

Center and left on turn 4

On the Roman left the light cavalry charges and the Numidians counter charged. The Numidians lose 2 light cavalry units and a third shaken and the Romans take some casualties but emerge victorious. The Numidian right flank is now broken due to the losses. In the Roman center the infantry moves up to engage the Numidian elephants and supporting skirmish troops. The Numidians lose 2 elephants out of 4 and the light troops hold their ground against the Roman legion assault and other units are locked in melee from a result of a draw. The Numidian infantry in reserve commits a light infantry unit to fill the gap in the center while the rest holds in place. A unit of Numidian medium cavalry in the center is also
Roman cavalry counter charges
committed to deal with the Roman right flank. The Numidians attack with renewed vigor on the Roman right flank. They hit the Spanish cavalry who separated from the infantry due to the rough ground ahead of them. The Spanish medium cavalry is destroyed after they countercharge and lose their support from a light cavalry unit. Basically I was force to chose to either counter charge which will lose any supportfrom the light cavalry and gain the bonus from the counter charge, or stay in place and lose the bonus but keep my support. The Roman right flank now has Numidian cavalry on it. This is a real pickle and gives me pause to continue moving the infantry forward.


Turn 5
Roman left is open
On the Roman left the light cavalry is free to advance with out worry as the Numidians are broken. A steady advance will put them within striking distance of the village in another turn or two but some of the legion is disordered. The Roman commanders will need to spens a turn reorganizing and wait for the disorder markers to be removed. In the Roman center the Romans push up steadily as the Numidians commit more light troops to support the remaining elephants locked in combat. The Romans prevail and now open the center. Only the Numidian infantry reserve stands in the way of securing the village. The infantry on the roman right advances past the melee with the last elephants. The Numidian cavalry remains a concern as the remaining Spanish cavalry unit falls back. The
Roman right flank is threatened
Numidians on the flank threaten the Romans and set up for a flank attack. The Romans will either need to face the cavalry or try to advance as fast as possible toward the village. At this point I am content with leaving the village attack to the legions in the center and left side of the field so I can anchor the right flank.


Wrap up

Roman center on turn 5
At this point we called the game. We played for 3 hours and got in 5 turns. We paused several times for references to the rules as we do not play them very often. We liked the game, it is balanced and forces you to use all of your troop types together as a team. We also liked the visual display of the game. With 10mm you get the sense of seeing massed units of men, horses, and elephants move about the field. It looks like you are seeing a battle from the air. I have been wanting to collect 10mm figures for a Seven Years War game and now I am inspired to do it after playing this game. Well done Jack.


Tuesday, February 21, 2012

The effects of ANSD Day 1

News Release:

Monday February 20, 2012 the FDA and CDC have issued a joint statement.

Threat Notice
ANSD threat in Delaware

This information is current as of today, February 20, 2012 at 18:20 EST

 ataxic neurodegenerative satiety deficiency syndrome or ANSD

What Is the Current Situation?

Beef and beef products containing a batch identification number A73216660112 are suspected to be tainted and must be recalled. The suspension of all beef sales is mandatory. All citizens are required to Contact the CDC immediately if they suspect they possess contaminated beef. Participation is mandatory without exception.Most of the contaminated beef has been accounted for but several shipments have not been accounted for and need to be located and disposed. Facilities handling the contaminated beef are being sanitized.

What Is ANSD?

ANSD - The virus has several brain-destroying components, one of which is a "prion," meaning a protein like the one that causes mad cow disease. Prions twist when they are in an acidic environment and become dangerous, says Dr Schlozman. How our own environment has changed to make prions infectious -- getting from the soil to the cows in mad cow disease, for instance -- is still a mystery.

How Can Consumers Protect Themselves?

The U.S. Department of Health, Food and Drug Administration, and Center for Disease Control has maintained a recall for Delaware residents urging citizens to avoid all beef byproducts and patties purchased in January 2012 with the batch number A73216660112. Any consumer found to be in possession of contaminated beef must avoid contact with the product. It is recommended that citizens wash their hands after handling raw beef.

Contact Information

Centers for Disease Control and Prevention
1600 Clifton Rd. Atlanta, GA 30333, USA
800-CDC-INFO (800-232-4636)
New Hours of Operation:
8AM-8PM ET, Monday-Friday, Closed Holidays
cdcinfo@cdc.gov
                                                                                                                                      
The afternoon of Monday February 20, 2012 Wilmington, Delaware.....


Pimp Leon is watching from across the street. in a school parking lot. "Damn news team, now the customers will be scared away". He thinks for a time and decides to stay quiet, he doesn't want any unnecessary attention. He knows that if he doesn't make a scene the team will be on their way that much faster.
 

The employees at Mrs. Lovett's meat pie stand are open but sales are unusually low.  They haven't been made aware of the notice for the recalled beef and start dishing out pastries filled with beef byproducts. Belinda Lovett is preparing the meat at notices a foul smell wafting up through the air. She has no interest in disposing of any bad beef and decides to add extra spices to cover up any off taste.She can't afford to throw out any meat or she would take an even higher financial loss.


A local construction worker , a regular customer, stops and orders the usual. "How's it going guys? I hope business is better than mine, this economy sucks". He orders two meat pies and eats them quickly. "I gotta go back and finish the shift and I can't be late, my foreman is a complete.. uh, I don't fell so...a complete assho..." His eyes roll back and he falls to the ground.


One of the working girls and Lori the sound engineer run to assist the poor guy . "I think he's choking ..wow he's turning green, i though they turned blue....eeewwww gross!" The worker stops moving and lies motionless.
 Turn 1
Zombie Initiative: 3
People: 6

The corpse attacks with 3D6 and misses both women rolling a 4, 5, and 5. At this point no reaction tests are taken  as people have no idea about what's going on. Good samaritans are stepping up to help a person in distress.


As the two women try to figure out how to help the poor soul reporter Angela Smith steps back, her dress is too expensive to get dirty but she yells at her camera man, "Jimmy, hurry up and get the shot you idiot, get over there and get the shot!" Several minutes go by until the workers eyes open revealing a colorless pale stare. Everyone is relieved, they were fearing the worst for the construction worker.  and he grabs for the prostitute and then Lori. The hooker gets mad and says not until you pay first you creep!" Lori is a little shaken and jumps back and the worker rises slowly.
 Turn 2
Zombie: 4
People: 3

The attacker stands and faces the stunned cook and cashier. They can not retreat or get out of the way of what is about to happen. The zed successfully charges as it wins the initiative and gains the surprise which equates to more dice for a melee resolution.

The worker groans and hisses with rage and the bystanders back up. The cooks in the food stand look with eyes wide open and are not sure what going on. The cashier is Ricardo  and he asks, "Hey buddy are you OK? you don't look so good". The workers pale gaze fixates on the crew behind the counter.
 The zombie charges and scores 1 hit knocking Ricardo OOF. The other 2 employees are stunned for the turn due to the ferocity of the attack.

 The crawling corpse grabs Ricardo and bites his arm and  then rips open his face. Ricardo falls screaming with blood spurting about. The rest of the employees don't know what to do. Should they run or render aid? The news team offers no assistance as Angela screams, "Keep filming...keep on them!"
 Turn 3
Zombie 3
People 1
The zombie is not satisfied with only attacking the cashier and turns on the short order cook. The melee result is not even close as the zombie scores 2 hits on the hapless victim. Mrs. Lovett keeps her wits about her but will run out of the area rather than try to fight off the zombie.

The cook is cornered and is also mauled and being torn to pieces. Mrs. Lovett screams and tries to escape.
 The news crew advances a few inches to get a shot of an attack in progress since they are out of view of the carnage taking place. No reaction tables have been rolled yet.

Mrs. Lovett is able to escape and uncharacteristically jumps across the counter. The news crew moves up for a shot of the attack. If they can make it out alive this will be great footage. The cook and cashier's lifeless bodies stir and the news team tries to comprehend the chain of events unfolding before them....  


Sunday, February 19, 2012

Sudan Figures in 1/72

Figures: HaT, Italeri and Waterloo 1815

At Fall In back in October I purchased several kits from HaT, Italeri and Waterloo 1815. I always wanted some figures from the Sudan and I love the 20mm or 1/72 scale figures. They are inexpensive and you can play out a good size battle in a limited space.  I still need to purchase some Egyptian infantry from Waterloo 1815 and a few more dervish kits.

I used the dark tone dip and should have bought the medium tone instead. The dark tone turned most of the white color gray and I had to repaint and touch up some of the figures. I was careful not to put too much on but some figures came out too dark as you can see. Well chalk that up as a learning experience.


HaT British Sudan Line


British Highland Infantry


Naval Infantry


Norfeldt guns


Egyptian Camel Corps and the Naval brigade


Dervish units and supply mules


Dervish rifles and camelry


HaT and Italeri Dervish


Dervish Rifles


Dervish leader and body guard


Saturday, February 18, 2012

Battle of Peitsang

Rules: Colonial Adventures
Scale: 28mm
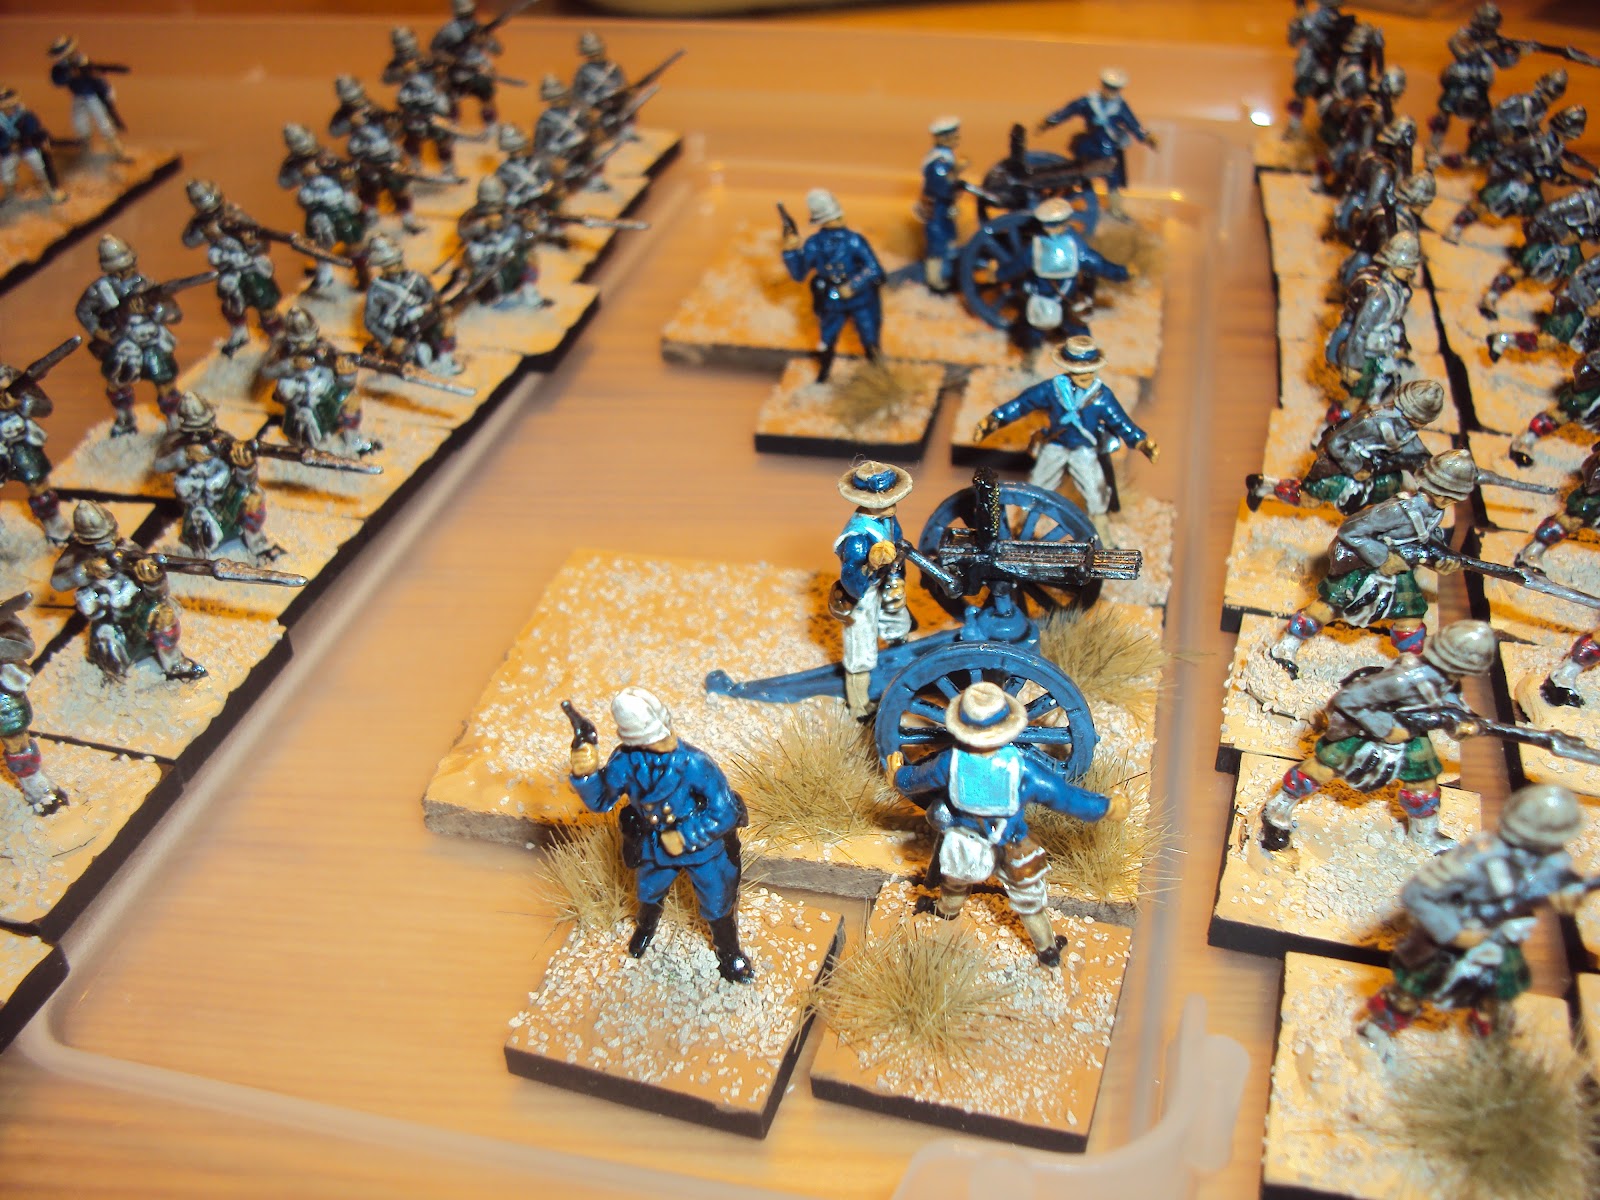
Figures: Old Glory, Copplestone
Rules Modifications: 
Western trained Chinese will react better than Boxer Peasants
1/2 Fire power dice to shoot at entrenched units
Volley Fire always creates a tight ammo result for the firing unit
-1 Fire power die for open order and Gun Crew target is cumulative
 Kansu are Ferocious
Rolling a received casualty per occurrence (once) rather than per figure(multiple times)...we did this on purpose to make the game play longer for sake of the convention.

We are play testing a game for Cold Wars and it is based on a scenario from a skirmish campaign book.

ALLIES
A combined force of British, Americans, Austrians, Japanese, Germans, Russians and French are advancing to an armory. The force is being lead by a charismatic Italian general (might as well include another country) and the attacking force is split on opposite side of a river. The attacking forces are starting 24" from the edge. All units are REP 4 except US Marines, Italian General, and British Artillery who are REP5.

CHINESE
The Chinese forces include 4 units of Kansu braves, Imperial Rifles, 4 artillery pieces, and a cavalry units which will not be included in the future OOB. We are contemplating the use of 2-3 mobs of peasants for cannon fodder and suicidal charges to get things started. Kansu are REP4 and all other units are REP3.

The goals for the Allies is to seize the gun battery on the west side of the river and take the two buildings on the east side of the river. The Chinese must stop the Allies and kill as many of the foreigners as possible in the process. The Players are Cliff, Tom, Leo, Jack, Kyle while Jim and I were the umpires.

The Allied Powers deploy for the attack.
 The Allies got off to a slow start an on turn 1 blew the initiative roll with a 6, so none of there units moved. The Chinese rolled a 5 so the General (Rep 5) moved to the cannon to activate it and fire. The allies took some casualties early but they continued to advance in open order to get the benefit of the 12" movement and a defensive bonus.  A few French and British troops are lost in the opening moves to the Chinese artillery. Acceptable losses in order to seize the objectives. The range for rifles is 24 inches and artillery range is up to 36 inches.


Kansu and Imperial Rifles entrenched and ready
On turn 2 and 3 the Allies cautiously advanced and the British received most of the attention from the Chinese rifle units. The British and French fired in the opening salvo and took out a gun crew which really helped their cause. The Chinese players thought the crew was killed too easily and suggested that entrenchments should offer more cover. Some of the Kansu Braves are hit and a failed casualty roll means 1 in 6 braves leaves the field. On a second received casualty roll the unit stands.

Rules Note: We are going to add a defensive bonus for units in prepared defenses. Fire power dice against entrenched units will be reduced by half.

British, French and Germans advance in the center toward the ford.
On the Chinese left flank the cavalry keep a unit of Austrians in check. The Austrians slowly advance in open order and begin to fire.  The cavalry lose one of their number but carry on. The Kansu Braves in the center begin to become thinned out by accurate rifle fire. The Kansu fire also hits on target as the British and French infantry lose several men. The Germans are moved in support through the woods but are slowed to a half move.


The Kansu have artillery to help repel the onslaught
The Kansu braves on the front line take several more hits and receive a tight ammo result which means they lose a die in their fire power rolls. The Imperial Rifles are moved to plug the gap that is developing.
The Chinese do not waver as their numbers thin. The captured Krupp guns are used to support the defensive positions but they also receive low ammo results. The Mules are brought forward to resupply the units.

Chinese Artillery and Infantry have tight ammo....and the allies keep advancing.
Rather than close the allied stop to exchange fire and soften the defenders before the inevitable assault. The only way to cross the ford is in open order so the allies decide to keep dispersed. The woods slowed the Germans to a 6 inch movement. The French marines were leading the way with the German Seebattalion in support.

The Allies stop to exchange fire avoiding a melee
The Kansu in the entrenchments take several Received Casualty checks through the game and stay in cover. Eventually the Allies artillery fires and causes no casualties which generates a Received Fire check. The Received Fire check causes the Kansu braves to charge as they feel invincible and want to kill people up close and personal. The Chinese players groaned at the result of having troops in good defensive positions charge mindlessly into the open. Thats the fun of the game as you really can't control every action or reaction of your units...people do crazy things in combat. The Kansu did survive the advance and ended up in the flank of the British unit. On the next Chinese activation the British were shot at and charged from the flank. So the result of having to advance worked out very well for the Chinese.


Imperial rifles advance...the French take a test of Wills check...they fire and miss with volley fire!
 The British rolled very well and never broke, there may even be a Victoria Cross for some of the Brits for being so resolute. In melee you only count the figures in contact. Being in open order is great for movement and fire but when you have a unit close in for melee you are at a disadvantage. The 1" gap between figures in open order means a single figure can be attacked by multiple figures. The British figures in contact are out number 3 to 1 by the Chinese who had no problem ganging up on them. The Chinese did win the melee but did not inflict as much damage as hoped for allowing the British to retire 12 inches away in the following turn.
The Kansu react to being shot at and advance from the entrenchments then on their turn they charge!
On turn 4  at the opposite side of the river the Russians and Japanese advance to seize the gun battery. The entry of these units, according to the scenario, is random. I think we will bring them in on turn 2 for the convention. A few Russians become casualties from the long range shooting of the artillery. Moving 12 inches in open order means the Allies can close in 3 turns and can fire in 2 turns.


Russians and Japanese advance under fire
The Russians and Japanese have a long open field ahead. On this turn the Austrians have won their combat against the Chinese cavalry. We assigned the cavalry a reputation of 3 to reflect their unpredictable nature as they are bandits and thieves looking for an opportunity to loot the bodies of the fallen.  They flee the field but were successful in stalling the Austrians for most of the game.

There is a long way to go...hurry up!
 On turn 6 the Chinese commander, who was attached to the artillery unit in the center,  is killed. The battery took casualties and the Chinese player rolled an 11! A Leader Loss result meant that 1 in 3 figures from each unit runs away. We then called the game as the Chinese units were melting away from continuous Received Casualty rolls.


Summary 

The game lasted over 3 hours. I did forget to add the leader die and +1 die for cover to the rolls on the crisis table. I should have known better and need to do a better job preparing for the game, but that's why we play test. The Chinese would have lasted longer than they did in some of the Crisis results, the only way to improve is to play more which is fine with me. What I really like about these rules is the reaction of your units. Most rules cover the negative actions and reactions of an army. Units in many rules sets rout, surrender, become disordered, etc. These rules are unique because they not only cover the negative reactions of routing but also cover successful reactions that include charging, advancing, and firing. The rules were well received by the new players with a few tweaks suggested. Everyone likes the fact that you can finish a game in a reasonable amount of time.

Joe from DAWGS....adios amigos

Sunday, February 12, 2012

Nuns and Guns

Our club planned on playing a boxer rebellion game this week end, but the flu has broken out in Delaware. So we had to postpone the game until next week. The game is a play-test for Cold Wars and we have to get done.  So I contacted a friend of the group on a last minute attempt to get a game in.

Scale 20mm
Rules:Force on Force
Figures: Liberation and Caesar
Vehicle: Dragon
Buildings: Gamecraft and scratch built.

Scenario

US: 1 squad with Humvee support
Quality D8  Morale D10

Insurgents:
Militia: Quality D6 morale D10
Former army unit: Quality D8 Morale D10

Location: Somewhere in East Africa
Situation: Insurgent activity has increased significantly. The UN has pulled back into safe zones after losing an APC involved in humanitarian relief. The US is committed to gaining control of an increasingly volatile situation threatening oil supplies from a neighboring country. Your squad has been patrolling areas outside the small town of Khatbad and is accompanied by a Humvee armed with a M240 and has improved armor. As you get near the interior of the village you receive a call that all air assets originally providing support have been recalled, but you still need to secure the supply base....Whiskey Tango Foxtrot....

An overview of the table, a small ford is at the bottom of the picture.
 The US players receive orders and enter from the roadway. They soon discover from the locals that the river can only be crossed at a ford  at the opposite end of the table from their entry point. This doesn't look good.

Trucks can been from the drone picture being loaded...uh oh.
 Locals are being used as human shields, the insurgents are busy working and don't notice the approach of the squad. Locals are being rounded up as the work continues.

A peasant is grabbed.

A local Catholic mission is seized...is there no shame.
 The squad (Quality D8, Morale D10) enters using cover to block the LOS of the insurgents. A fire team enters a building and neutralizes an RPG team standing guard nearby. They also engage the insurgents loading a truck. The US players are confident that they will not hit the locals and rolls well avoiding civilian casualties in the fire fight. Rolling a 1 or 2 with a quality die means you hit a civilian, creating a problem for you and the politicians back home.


The fire team goes to work while the other maneuvers along the road.
 Fire continues as the civilians are too scared to move. The second fire team moves up and engages outside of the 2 inch buffer provided by the human shields. The Humvee hits the gas and rapid moves to draw fire and lend support with the MG.

Pictures from the drone showing the squad taking a position.
 A hidden RPG team pops up...they score a hit and roll on the damage table. The vehicle is only suppressed and the gunner passes a test to remain exposed. The militia that were loading the truck react by moving to the building behind them. This stalled the US player for 2 more turns but the insurgents lost their human shields in the process.

Insurgents dish a little RPG surprise for lunch
 The fire and maneuver tactics works extremely well for the US. They push the enemy back and seize the compound. The hostages are secured and the cache is inspected...
Civilians secured! Now whats in the drums...
Now the US players understand why the air assets were really called off ...drums of Sarin gas are being loaded in the trucks. The civilians are escorted to the Humvee giving the US player 4 points and discovering the cache for another 5 points. Now the US players know the real reason an air strike was not called in....they are expendable, and word of chemical weapons caches cannot get out and embarrass the current administration...those duplicitous bastards! They seem to be on a roll but then things start to turn. Reinforcements of militia arrive and engage the Humvee..again the militia take casualties and fail to dish out anything. The Humvee is again suppressed.


More militia arrive as the US fights forward !
 The US squad dispatches the insurgents holding up in the building and move into a tree line. Fire from across the river begins to hit home as a unit of regulars kills a grunt and wounds 2 more. The casualties are loaded into the Humvee (I know I need more Humvees as this one is getting crowded). The Humvee crew replaced the light and seriously wounded as the US regroups the squad with the crew. The Squad pushes across the river under constant fire. The insurgents across the river react and roll a 1...they receive the fog of war card ...Mad Minute and gain an extra Fire Power die on the next combat roll. On a subsequent reaction they roll another 1 and receive another card. They receive a non-combat casualty...1 figure is seriously wounded. He must have stepped on a snake or scorpion...damn the luck. His screaming and frothing at the mouth do not phase the rest of the group as life is cheap in this part of the world.

The US move to the tree line and another fire fight erupts.
 The US takes another KIA crossing the stream and 2 more are wounded lightly in the building. The hidden insurgents in the trench successfully ambush the US player which caused some of the casualties. The US returns fire and gains the advantage.

US advance quickly but take casualties....they failed 2 attempts to pop smoke before and during the crossing.
 The US player discovers more drums. Sarin gas or perhaps something more nasty...maybe old Soviet stockpiles of CK. A fire team moves into the building to avoid hitting more civilians. More fire and maneuver, but at a price. The Humvee was used as over watch abut US casualties are inevitable.
The SAW gunner tears em' a new one
 The militia loses more and more. Several fighters were lost during morale checks. For every 1 that was rolled the unit lost 1 figure.  The bunker gave good cover but the US rolls were hot and they eventually wiped out the last of the resistance.
A view from an insurgent strong point
 The US mops up the rest of the insurgents and checks on the wounded. Two more hostages are rescued, more nuns giving the US 4 more points. The last of the insurgents fled the field giving the US player the stash of chemical weapons.


The US eliminates the last of the insurgent activity
The game lasted about 3 hours as the US had some difficulty in the beginning. Having a unit of trained fighters for the insurgents made a big difference in slowing down the US and causing a few casualties. At first I thought it would unbalance the game but it worked out well. I would like to have used the technical but I forgot to bring it into the game. I wanted to use vehicles to try the rules out with something more then infantry. The next game will involve a larger table, snipers, mortars and the effects of Khat, a stimulant used by insurgents to toughen up. I have really grown to love these rules. Hopefully I can play another game soon. Now to buy some more Humvees from Dragon and a few contractors from Elheim. Now for that Boxer Rebellion game .....