Tuesday, September 27, 2022

Sudan Supply Run

Rules: Men Who Would Be King Scale: 1/72 Figures : HaT, Italeri We each built up forces of 36 points each. The British player must transport supplies across the board to a nearby village. British unit Leadership is 7 for all units based on poorly rolled random stats. The Dervish had most units at a Leadership of 5 based on great randomly generated stats.
The British had to escort a supply convoy from the upper left of the board to the lower right.
Since the Leadership was 7 with a +1 modifier we thought there was a good chance the Brits would move most of the time. We were wrong.
Poor activation rolls of 5 or less plagued the British through the game. Many key units were static and the Brits could not move forward. The Dervish moved across the board quickly.
The convoy was stuck in the beginning third of the board.
The Mahdi forces were able to close and cause significant casualties but there was too much rifle fire.
I would have liked the British to be more maneuverable. I can't say the British won, they became mired. I needed to give the Brits a limited number of turns to make it across. The British infantry will always win a standing fight, so giving them an objective to move the supply convoy across the board was a bit too challenging. I may need to change up the objective or make it easier to move across the board. One failed activation really hurts the British player.

Saturday, September 24, 2022

Sudan - The Men Who Would Be Kings - First Game

British / Egyptian force Scale 20mm or 1/72 Rules: The Men Who Would Be Kings Objective: British need to obtain supplies I was able to get a copy of the rules for $9.00 and as much as I love The Sword and the Flame, I wanted rules that would move the game more quickly. 
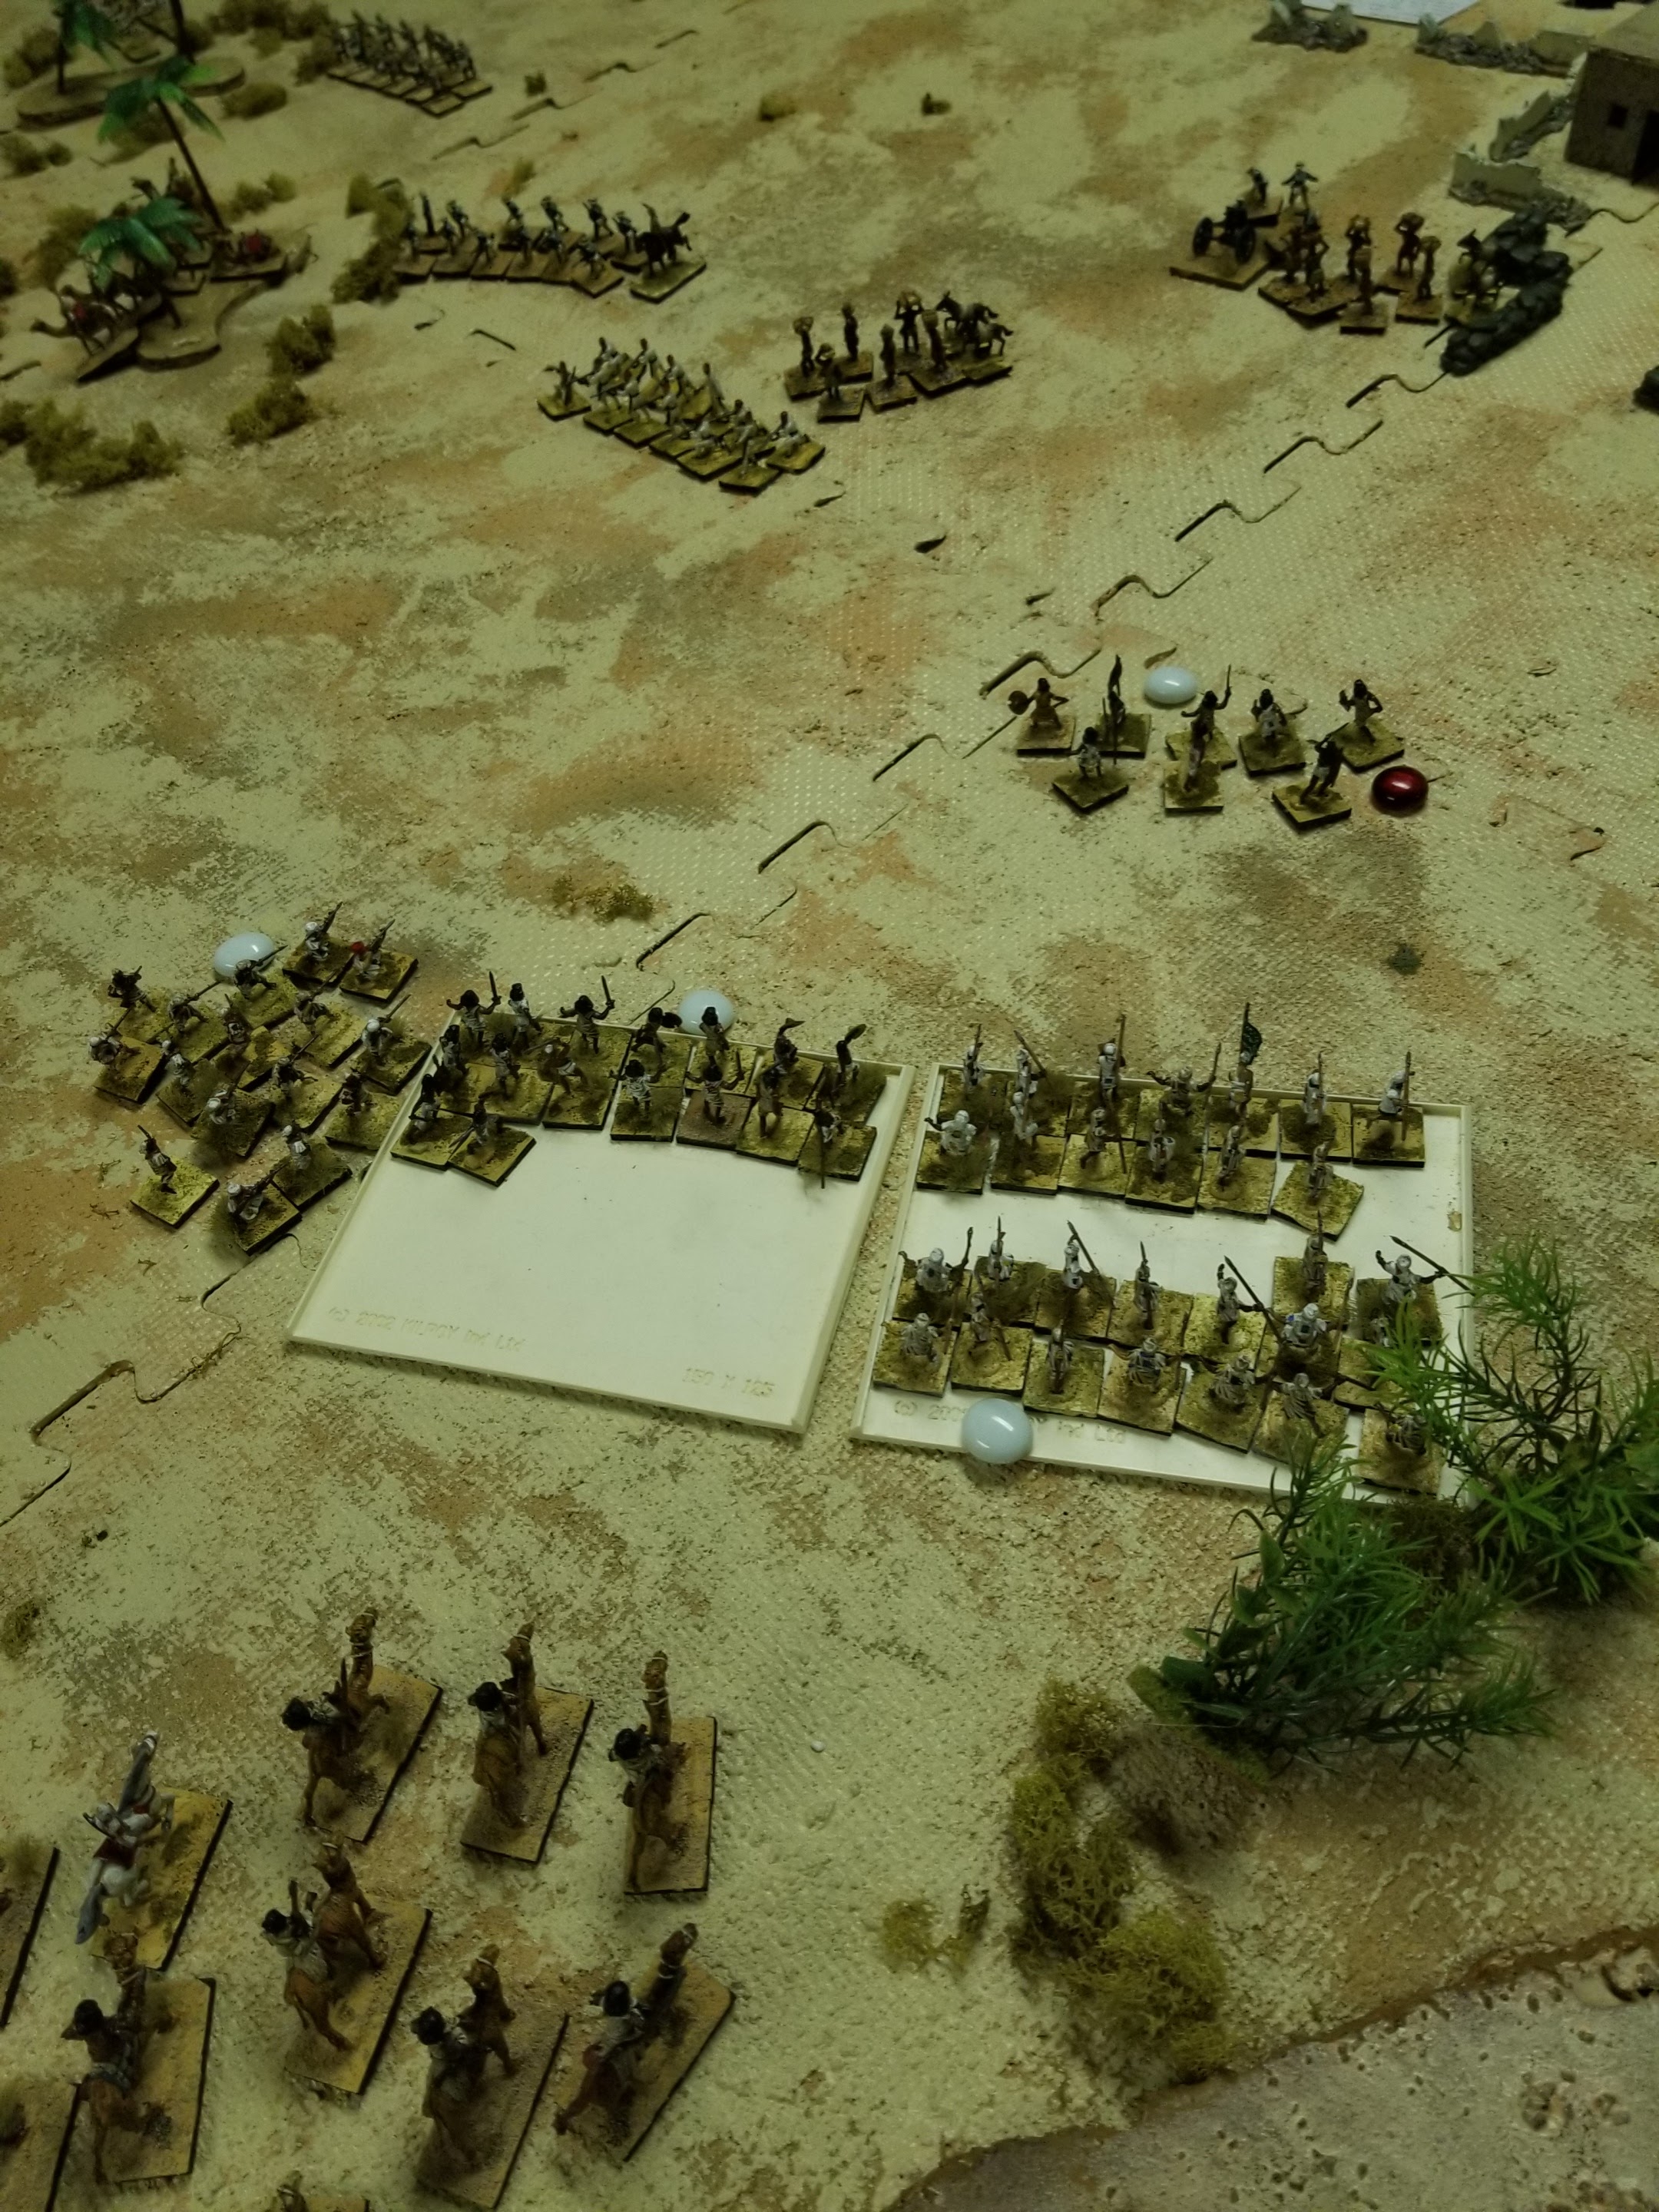
We had 2 Highlander units, a unit of Naval Infantry and an Egyptian unit trying to move forward to a town to scrounge for supplies. They were opposed by a unit of mounted Tribes men, a unit of rifles, and 6 units of infantry. The board is sparsely populated with terrain. There are hard and soft cover with a few hills. We skipped customizing units and leaders until we get a better understanding of the rules.
The Mahdi forces start off in the hills and will quickly approach from the opposite side. Since they can move free they will cover a lot more ground then the Brits.
The Mahdi cavalry move in losing only one figure to fire.
The infantry moved across the field to the walls with no opposition as the British moved slowly, in fact the Naval infantry failed activation twice and never moved after the first turn.
The Mahdi rifle unit moved to the left to delay the British, getting pinned in the process
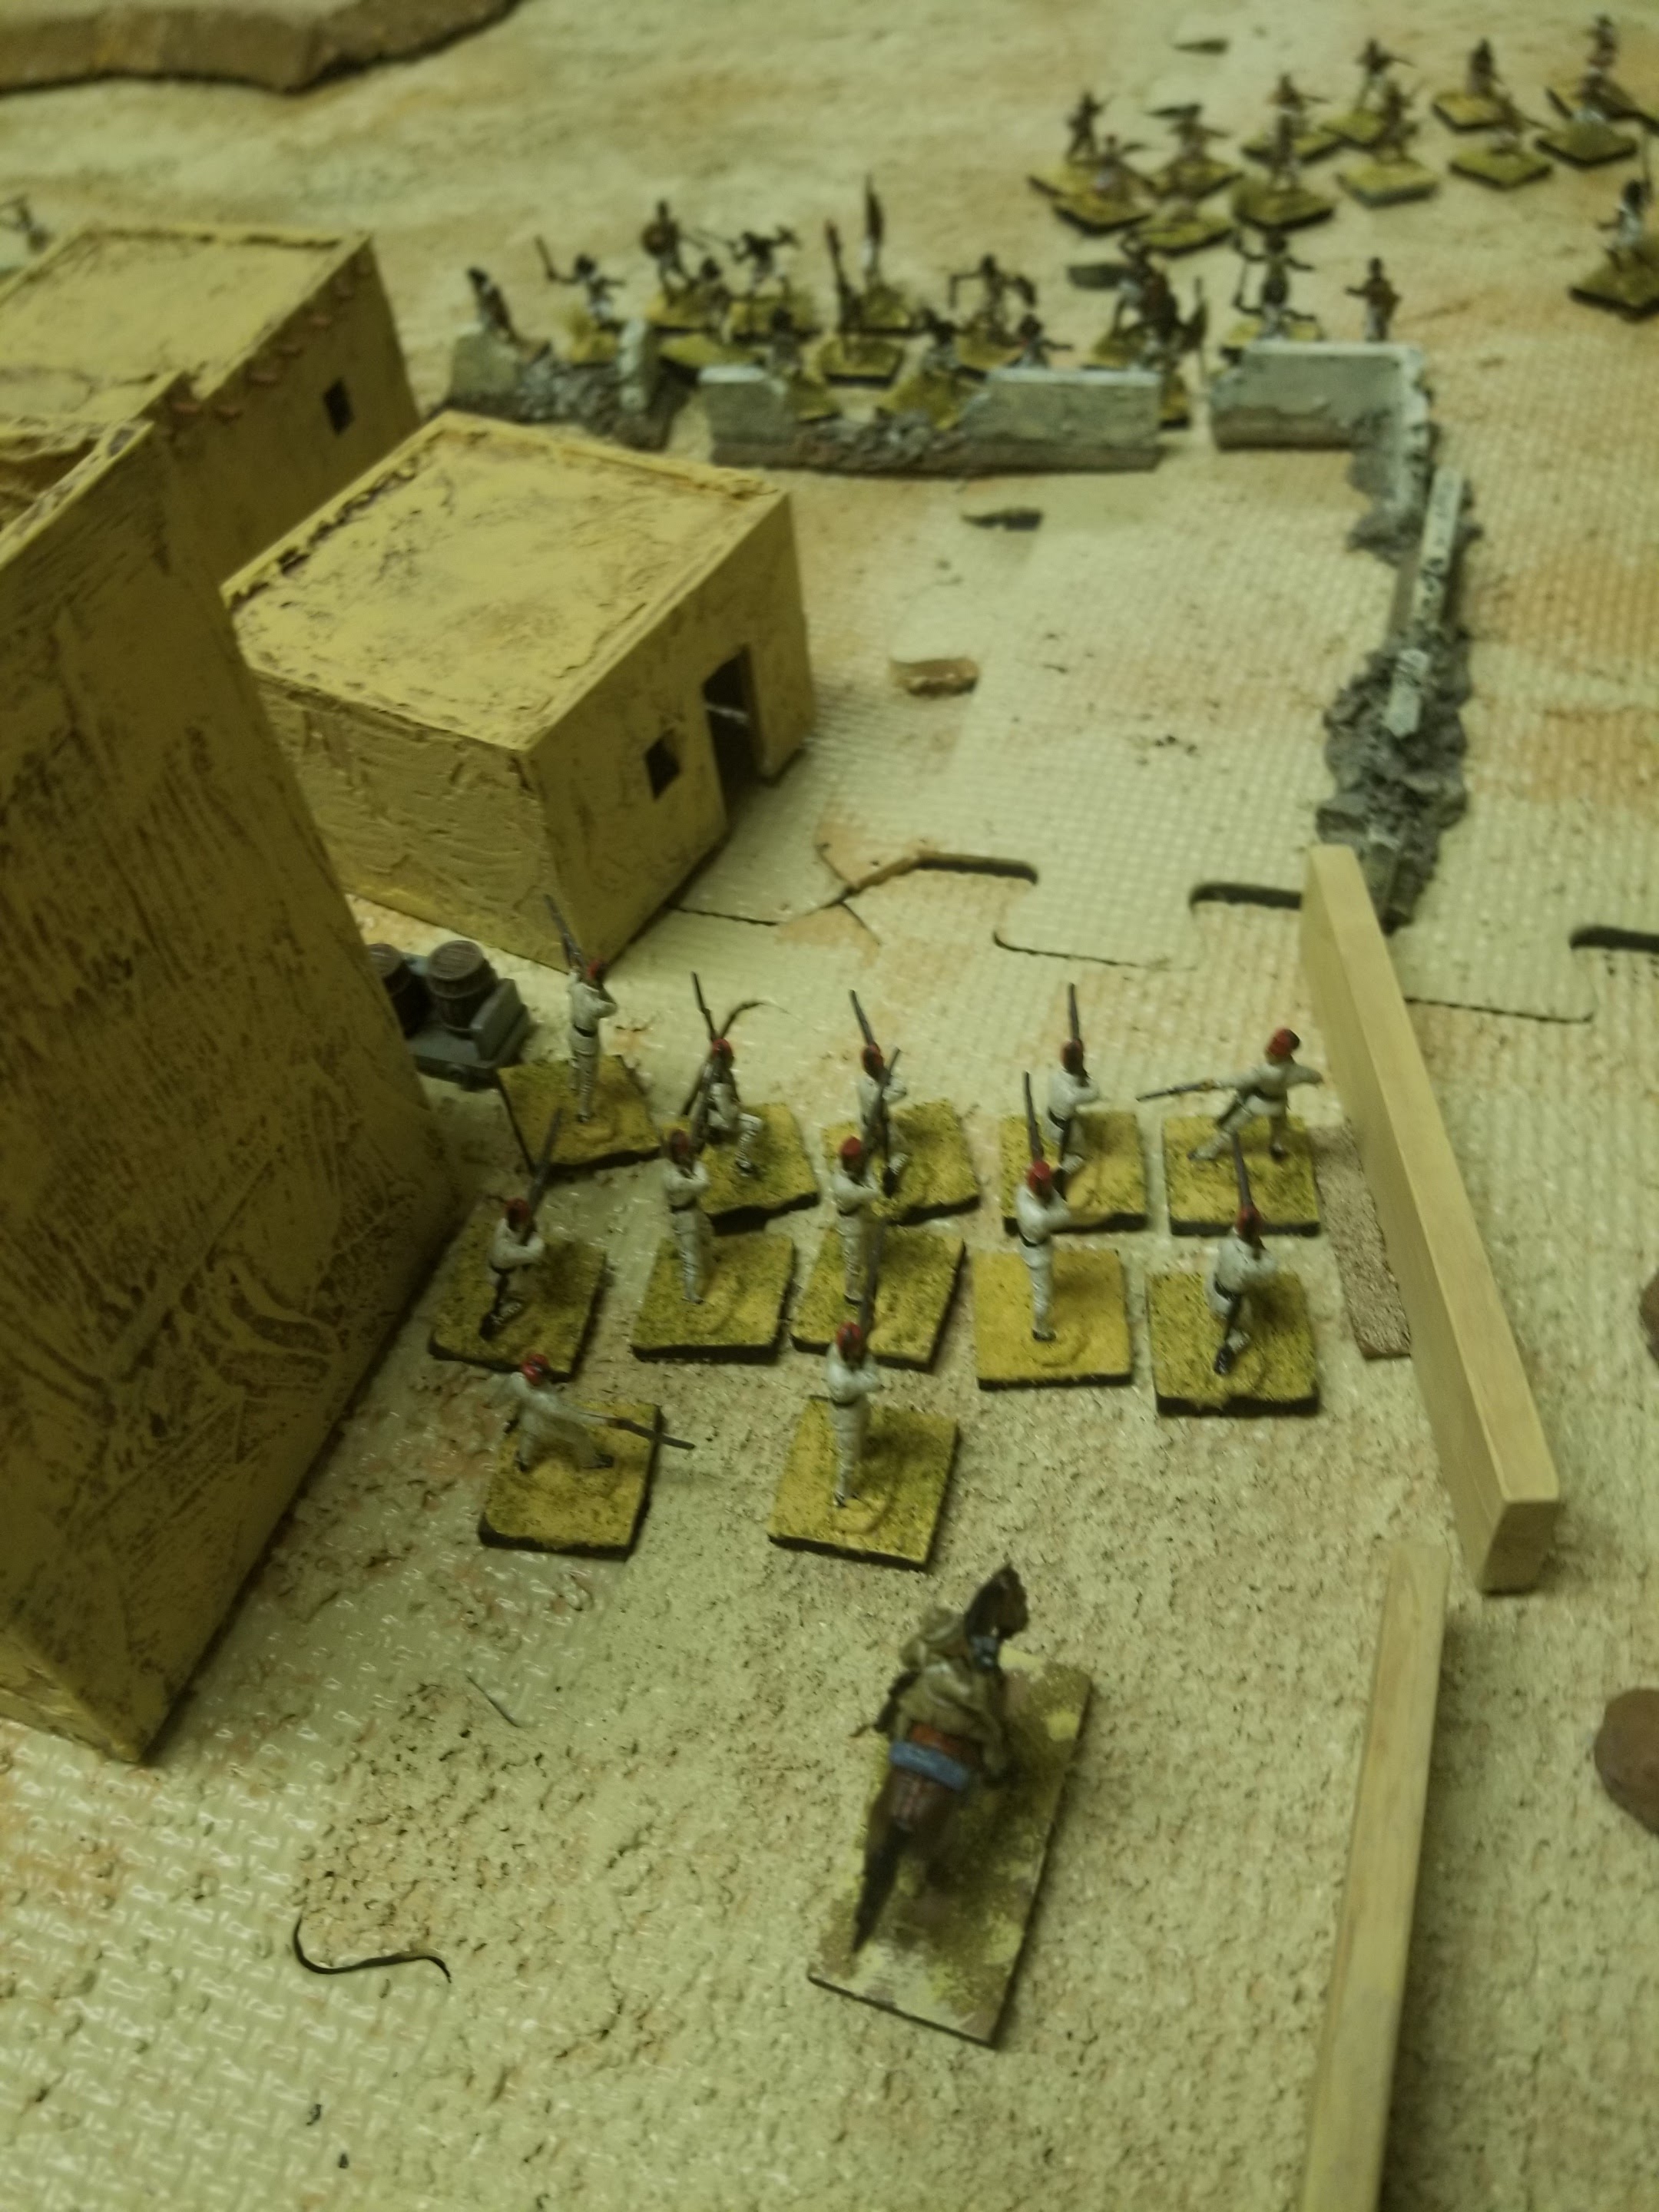
The Egyptians gained access to the village but could only move half distance because vllages are difficult terrain.
Soon the Mahdi rifles on the left are reinforced by a unit of Fuzzy Wuzzy which is also pinned.
In the village the Egyptians meet the tribesmen after grabbing some supplies, they were driven out before obtaining the second set of supplies.
Meanwhile on the backside of town the Ansars try to charge the Naval infantry but fall short by one inch. The Ansar are met by a volley fire which reduces the tribesmen and pins them. A unit of Fuzzies makes it in town but fail to charge the Egytians until 1 turn later and pushed them out of town. .
The Brits hold the Madhi left flank preventing an overrun.
The game was very close but the Allies pulled it off. I really like the rules, there are no surpises and they do the job with no flash. I will be using them for gaming in the future. The British were not very mobile due to a 6 inch move rate, which is halved in difficultterrain. The British fire, especially volley fire, ground the native units to a pulp. Hidden native movement and ambushes will be a good addition. British troops do take far more casualties in these rules then The Sword and the Flame rules. Melee is also resolved faster. Will try another scenario soon.

Wednesday, September 7, 2022

ATZ - The first week after the outbreak

Figures: 28mm Wiz Kids, EM-4, and various manufacturers Rules - ATZ (2009 version) The police have sent 2 rescue squads to search and retrieve survivors. As the police approach they aren't sure what they will find. Several zombies walk aimlessly around the town. Each squad will go to as many buildings as possible to search for survivors and scrounge for supplies. The road ahead is daunting A card (Risk and Rewards deck) would be flipped when the building was entered to determine who or what was encounteredThe options are Survivors, Zombies or nothing.
The mission is to clear as many buildings as possible to find survivors and supplies and exit off of the opposite edge.
Since shooting can attract zombies the police try to do melee, a very bad decision. They scored no successes and were quickly overrun. The 3 surviving team members leave the fallen and run into a factory. This is not a good start for the first team. From now on its all firepower.
As they enter the building they find no one but uncover a crossbow.
The second team lost no one and was able to rescue 3 survivors
The zombies were able to take out 2 members in the second turn were feasting for 4 turns. This enabled both teams to fast move and create distance.
A second zombie mob emerged near city hall. Both teams were fast moving until the end. Then tactical movement was used to prevent any surprises from random directions.
The second team (Bravo) rescued more people and won the game. These teams will be used again, including new members, to continue their escape.

Monday, August 15, 2022

Completed units French Army for Marengo

For my initial spend of about $100 I have 6 units of infantry, 4 artillery, 6 stands of cavalry and 10 bases of skirmishers. These turned out better than expected as i am not a great painter. At Historicon I picked up more Cavalry, Napoleons HQ, more infantry, and the Wurstwagon kit from HaT to act as supply markers.

Thursday, July 21, 2022

Nemesis

We had a 4 player game recently and it was the first time I played. The game is on par with Dead of Winter (zombies). There are several roles to play which we selected randomly. Jack's role: Soldier, Kyle's role: Bounty Hunter, Jerry's role: Pilot, My Role: Engineer, We started off with personal goals. Mine was to send the ship to Mars if the Alien nest is not destroyed, and if it is destroyed to go to Earth.
The board is set up with fixed locations that hold random rooms, and each room contains an encounter token for an event when entered. As I was an engineer I could open and close doors which can delay aliens or deter the rest of the crew. Why would I do that? Each player may have conflicting goals. So it may be necessary to lie to the crew or sabotage parts of the ship. Since I am the engineer I went to the engine room to see if the engines were even functional. I did check them and since I wanted to go to earth or Mars I wanted them working. I had to repair 2 of the 3 engines. This actually hurt me as I could not make it to the bridge the entire game. Since I was not able to destroy the nest and no one else was interested in the course to Mars
The first Alien contacted was an adult. It encountered Kyle who was able to escape with minor injuries. As I had a shot gun with only 2 shots I wasn't iuntested in fighting. Each contact is randomly generated from noise tokens. You could face a small creature, adult, breeder or the Queen. They appear when a location gets 2 noise tokens placed. When I was checking the engines an adult popped up, luckily I was with the soldier and together we killed the creature. I did get wounded and recieved a contamination card. Since you only get 5 cards per round you don't want these as they keep you from drawing needed items and abilities. Although you roll dice to hit and damage the aliens each creature draws a card to determine the maximum damage points it has, and breeders and queens draw twice. This means it may be easier or harder to kill each time.
a Another reason I avoided the bridge is that an adult Alien appeared and stayed there. Since they move randomly you don't know if they will leave or move toward or away from you. This is what stopped me from going to the bridge to reset the course to Mars.
After turn 10 the cryogenic room allows you to re-enter the sleep pods. If you enter too early you could lose as the ship can catch fire, blow up, have more engine faliure, so you are encouraged to enter as late as possible. If necessary you can also leave by life pod which shoots you safely into space for possible victory. At this point you may want to go near life pods as they can be accessed after turn 9, unless you have a key to enter earlier.
As the game progressed I was trapped near the engine rooms as the cryo room was on fire with aliens running around. I wasn't able to enter the sleep pod and I couldn't make it to a life pod. Id ied horribly being ripped to pieces as was Kyle. Both Jack and Jerry were able to escape and win meeting their objectives. In summary it is a fantastic game with loads of tension. I would definitely play again. The play time was about 3 hours and the time flew by.

Sunday, July 17, 2022

Early Napoleonic French Army Progress

 There are 6 infantry units, 5 skirmishers and 4 artillery batteries painted but the bases are not finished.

I have enough figures for 5 more skirmishers and another infantry unit, and I have not started on the cavalry. This is a pretty good force for the money. The force will have 6 units of 24 figures, 4 artillery and 17 figures of light cavalry. 

Figures                         $71.62

40mmx40mm Bases:   $18.50

Shipping:                     $19.95

Total Spend                  $110.07


French Army 1800-1806Qty purchasedCost
HaT 8297 French Command16.99
HaT 8296 Early French marching16.99
HaT 8062 French Line with Officer18.99
HaT 8229 French Arty 180518.99
Shipping11.40
Total43.36
Bases 40mm x 40mm18.5
61.86
Hobby Inc 6/20/2022
Italeri 556080 Light Cavalry115.09
HaT 8297 French Command211.78
HaT 8146 French in Greatcoats112.79
Shipping8.55
48.21110.07


The Infantry are a mix of wearing great coats and standard uniform. This would reflect a mix of regulars and conscripts through each unit. From what I have read there were one battalion of regulars and 2 battalions of conscripts in each regiment at the start of the Italian campaign. 


The artillery looks better than I thought they would and are bigger than expected. 


Next purchase

I have found heavy cavalry (Italeri Prussian Cuirassiers Set 6007) that can be used for French Cuirrasiers and Marengo. I will look for them at Historicon. Early French Cavalry had the bicorns from what I could find in research.