Tuesday, January 31, 2012

UN Recue in Africa

Rules: Force on Force
Scale: 20mm
Figures: Caesar and Liberation

I received the rules about a week ago and couldn't wait to give them a try. I played them twice over the last 6 months and I had to get them. I played a test game and then my son and I played a second game.

I took the scenario from the book in which US forces rescue two contractors surrounded by Iraqi forces. I replaced the contractors with UN soldiers and put the scenario in an African setting. Here is the result.


The Table is set up per the scenario
 The African militia are set up in small units across the board. They are using the UN forces as bait and will not fire at the exposed troops. They know the US forces will be sent out to rescue the UN and think they will have the upper hand.
The African militia form up and wait
 The RPG team fails to react and the building is quickly seized. The high level will make a great over watch position. Two of the other fire team are hit by some of the hostile mob across the street but roll an OK result (double 6's).

The US form up and take the building.
 The RPG team on the roof top are neutralized as the over watch team takes up position. The US has only a few turns to reach the stranded troops and return. The firefight was not successful for the militia and their casualties increase. The African morale is a D10...must be chewing Khat before the battle.

The Africans move and keep firing in reaction
 The US fire teams start their mission and begin to move by turn 2. They have their hands full and have to clear the way for the rescue. The US is rolling about 8D8 in their action rolls against the African D6 rolls. The US is averaging about 3 hits per action as 8's and 7's can not be canceled by a D6.

The troops on the roof are on over watch and the other fire team moves out under cover
 Most of the African troops are leaderless and with a D6 quality they are slow to move or react. In this scenario they have completely random reinforcements and entry points. Being irregular forces the Africans can only react once. Regular troops can react move once and react fire multiple times.

The Leaderless mob...they could be a problem.
 The M113 is damaged and the troops wait giving no support to the US. They will fall under the dependent rules within FOF.

The UN troops are of no help according to the scenario rules
 The US forces are really dishing it out as the militia fall and some run away as I roll a "1" during morale checks.
The US fire team scores some hits.
 The maneuver element of the squad is moving and firing. The over watch did very well in dealing out some punishment. irregular troops are not pinned but are actually shaken and their morale of D10 quickly becomes a morale of D6.

The US fire team works their way forward being reacted to all the way with an over watch helping them.
 I have a mix of Caesar and Liberation miniatures which look ok together. The Liberation are a bit chunky in comparison and are needed since Caesar minis don't have the M249 minime in the kit.

They are only fast move away!
 The US forces reach the UN troops by fast moving which actually worked out well. African troops score 2 hits, a light wound and a kill!

Got'em...haul ass back to the rally point.
 The African militia get reinforcements that arrive a turn too late by the stricken M113. They did score some hits as the over watch failed a previous roll. In the next turn they are decimated as the maneuver elements remember to pop smoke.
African reinforcements appear every turn...time to call broken arrow?
 The remaining African troops lose heart and gather their wounded. The US did retrieve the UN troops but had 2 KIA and one light wounded soldier. I had to explain to my son that he could not leave the KIA behind as that would be a political victory for the militia, the news reports would be very damaging.

African militia pays the price for their resistance.
We both really enjoyed the game and rules. We played 2 games in 3 hours and had to stop several times for references to the rules. I can see my self expanding my collection so I could run a game on a 4 x 6 board. It would be fun to have a 6 player game that takes place in a large town. I need to get some Elheim figures, Dragon vehicles and some foam core for some new buildings.

Monday, January 30, 2012

Flames of War Games

Flames of War night for the club so each player received a 500 point force and took part in a head to head game. We had 3 games going on at once so there is no AAR for the night's activity, just some photos of a fun relaxed night. Only a few of the club actually plays FOW regularly. We have been discussing a campaign for operation Market Garden or Monte Casino so we need some hands on experience with the rules.

Rules:Flames of War
Scale 15mm


The set up - Each player picks their forces
 The 6' x 12' board was divided into 3 different games. The most experienced player was umpire to all 3 games and we took it slow  and asked a lot of questions.

Game 1

Game 2

German Panzer Grenadiers from game 3, my game and forces

The opponent in game 3 - The Indian Army

The Generation Gap - Jim Ferich (host) and my son Kyle


Jim F. attacks the town defended by Kyle.

Jim is attacking toward the town

Game 3 - Jim Carpenter has the Indian army and I have the Germans at the bottom


Americans and Germans go at it in game 1

The night went quickly and we finished all the games. I have only played FOW about 3- 4 times over a couple of years and we did learn the rules quickly. We heard that another version (version 3) will be released this year. I didn't get a chance to hop from game to game since I was playing and learning. We hope to get the campaign running soon.

Sunday, January 15, 2012

The Battle of Gerald's Ford

Rules: Black Powder

Figures: 28mm Most manufacturers represented

Zulus vs British

This is the first game of the new year. The club has not met since November so there were a lot of members present. The game takes place in Africa as the Zulus are n force in the area. A British column is approaching a small outpost from the opposite end of the table.
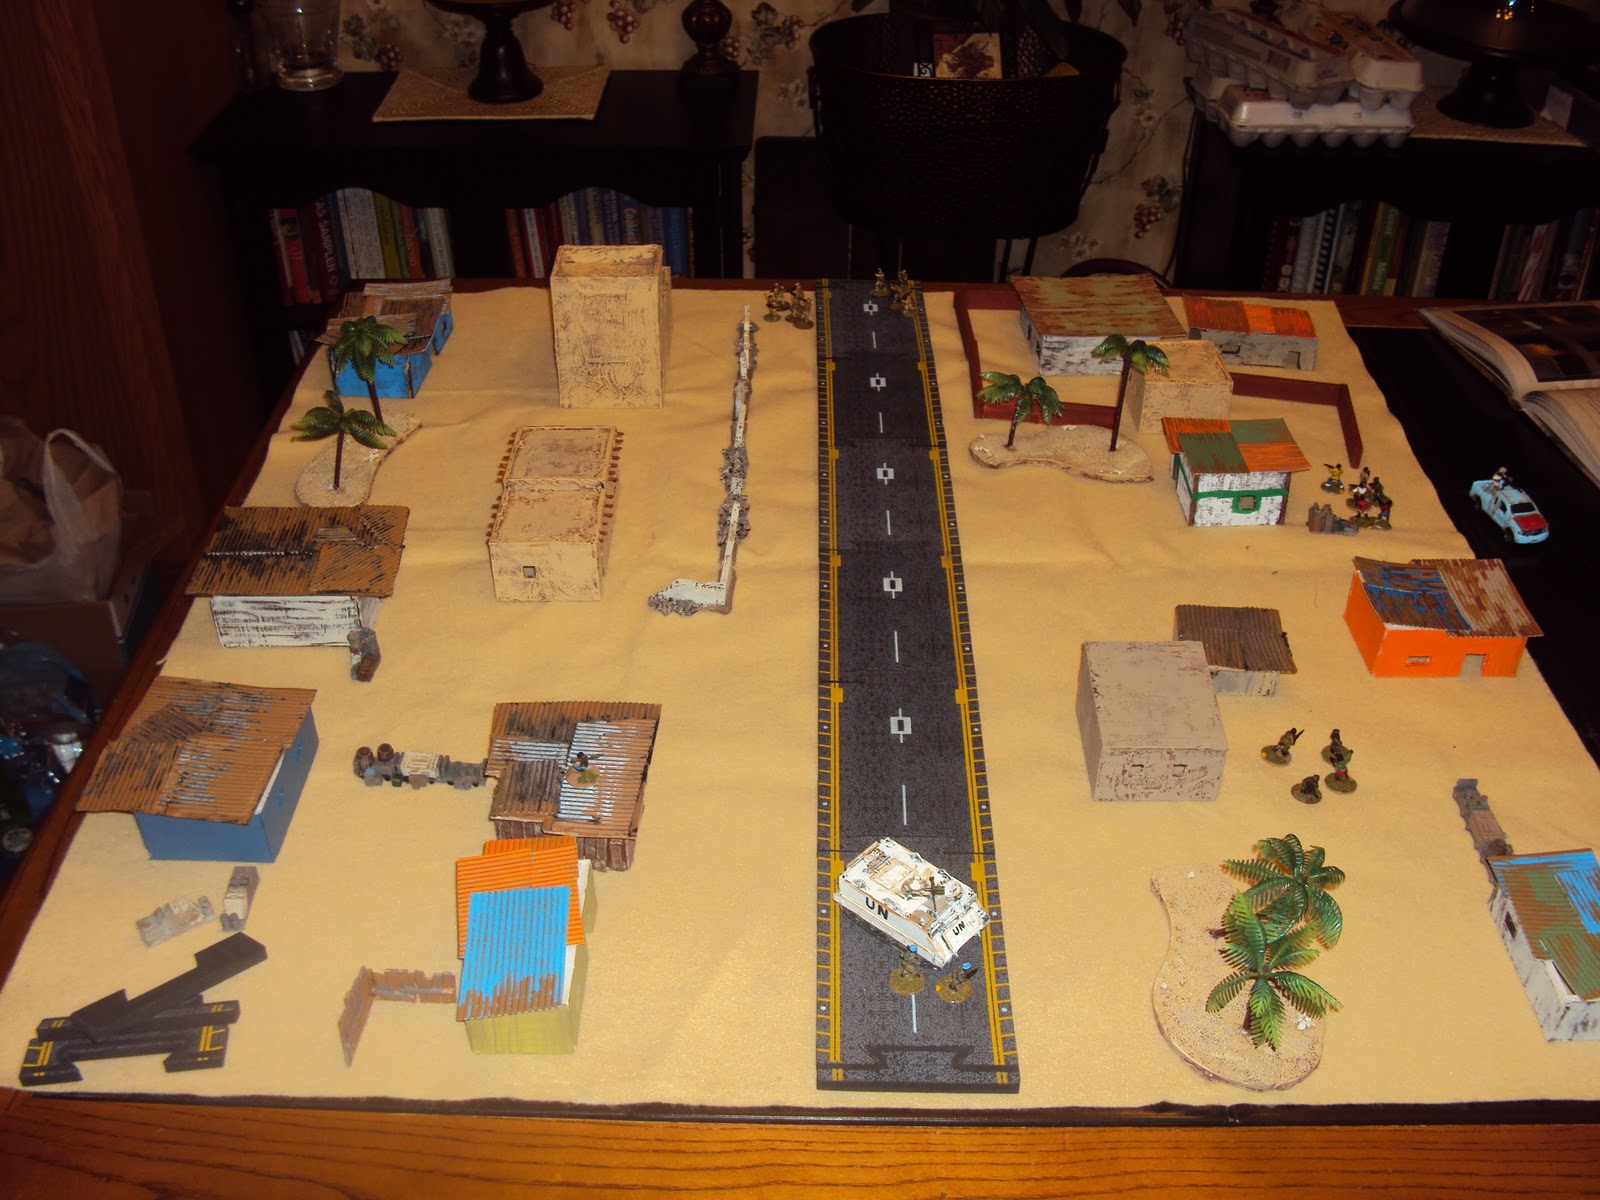
The Game Table

The outpost contains a small infantry unit supported by a Gatling gun. Morning brings no news or activity from the surrounding country side. The soldiers in the outpost hear the approach of horses in the distance.


The first unit to enter are frontier horsemen. They arrive ahead of the main column scouting the countryside.


Suddenly the steady clatter of spears hitting shields is also heard. The Zulus are on the march and the Zulu impi creating the head and chest makes the first appearance. The left and right horns make an appearance later as the initiative rolls dictate.

Zulu Impi of the chest

Additional units enter with 3 impetus or up to 36"in movement.The skirmishers are deployed up front to absorb any shots. They will count the guns by sacrificing their soldiers.


Skirmishers in front and 2 more units on the left flank

The British column arrives and the commanders know they need to deploy quickly. The Zulus are moving fast and the British don't want to be caught in column.

The British column enters

The British figures are painted to a very high standard. They are based individually and placed on movement stands. We play TSATF, Black Powder and other rules so we need to be flexible with basing.

The British line infantry in column

On the next Zulu turn the left horn enters. The Gatling gun had been firing at the center units but missed. The outpost commander knew he had a problem and redeployed the gun to face the new threat that was closing in.

The Left horn enters on the next turn near the fort

We had a lot of players and we caught up on all holiday news. The Zulu Players are on the left contemplating their next move and discussing hobby news. The person seated in the center is the British outpost commander Joe Krone.

The DAWGS , Zulu on the left, British on the right and center

The British players Jim, Dave, and Leo, are getting instruction from the game master Jim Ferich. You can see Jim's extensive collection on the shelves in the background.

More DAWGS playing the British

The British deploy and the Zulus try to close. The British need to keep moving up as more units are following and they don't want to be crowded in.

The British form line
The British move slowly and the rest of the column is coming in with limited space. Both side are rolling and getting one impetus and delaying the inevitable.
The British and ANC form up to slug it out
In a larger view of the field you can see how the British started out. They entered in column and bottled up due to having one impetus, meaning a 10 inch move. They couldn't get all their rifles on the line but did enjoy support in case the Zulus close on them.

The Brits try to move forward


Kyle, my son and one of the Zulu players, declares a charge! He rolled double 6's and got that sinking feeling. His fumbling resulted in a charge so he still got to close. Basically he fumbled and bumbled his way in. I guess it doesn't matter how you get there, just as long as you do.

A charge is declared...Double 6s...and the result is ....a Charge!

The Zulus are moving to support the charge. The British fire has been not been effective so far and the Zulus slowly close. The Zulus finally make contact on turn 3. Jim and Leo had to fight right out of their staging area.


Zulus make progress against the Brits

The British are shaken but stay on the field. The Zulu skirmishers in the rocks take the brunt of British fire and are also shaken but stay on the field. The British have a characteristic called "Steady" and get a re-roll on one failed morale roll and it really made the difference. The British absorbed a lot of what the Zulus could throw at them.


The red markers show shaken units and the white markers show disordered

The Zulu movement on Turn 3. The Left horn made their appearance. Jerry Accord was commanding the left horn and he stayed back. His job was to prevent a crossing at the ford and the British were still tied up with the center formations of the Zulus. Kyle Schulze and Eric Boyle had their hands full as the Zulu commanders of the chest formations. The British columns kept coming in and there were more than originally thought. Joe Krone the out post commander was constantly shifting the machine gun to meet the new threats as they appeared.

At the outpost the Zulus hold waiting for an opportunity

The Zulus in the center cause a British unit to flee the field which opened a gap in the lines. Another British unit begins to waiver. The Zulus appear to be in a strong position and the left horn has not entered yet. When the British begin to fire the Zulu ranks thin and units begin the hit their point of being shaken.

The Zulus defeat a British unit opening a gap but face withering fire
Shaken Zulu units are forced to fall back and British cavalry closes in for support. The Zulu right horn finally appears on turn 4 from the rocks. The British slowly move forward keeping their lines straight and preventing gaps from opening. Their are few units for support. Once again the British ability to re-roll one failed morale roll makes the difference in the battle.

Zulus in the center begin to break
On turn 5 the British must refuse their flank to keep the Zulus from over running the ANC and British units on the exposed flank. Chris Ferich is the Zulu commander for the impi  making up the right horn. The first few units made contact but it was slow moving through rough terrain for the Zulus. Units from the center are in disorder and shaken. They need to be rallied but the Zulu commander has more than enough on his plate and can't rally everyone. His priority is to rally the units closest to combat and hopes the right horn will pick up the fight.

The center is broken

The right horn fails to win the melee and most of the units are now shaken. The Zulus must retire and give the British the field. As for the victory conditions the British failed to get any units across the ford but did hold the field. Depending on your view it is either a draw or a Marginal British victory.


The center tries to rally but its not enough and the Zulus leave the field
We finished the game by 10:30 pm so it took about two and a half hours to play about 7 turns. Our club prefers rules that allow us to finish a game in under 4 hours. We typically start playing around 7:30 pm and play until 11-11:30 pm. We like to discuss the difference between rules. We are convinced that Black Powder meets our needs for the periods it covers. Had we played TSATF we probably would not have had a decisive outcome in the alloted time. TSATF takes much longer to play a game of this size, but we still love those rules (Thank you Larry Brom!). Colonial Adventures also comes up in discussion as a really good rules set that can be modified to meet our needs. We are discussing future games for a Flames of War campaign for Operation Market Garden.

Friday, January 13, 2012

5150 Star Wars Second Play Test

Rules 5150 SA
Figures : 28mm Star Wars 

Here is another play test of the new 5150 Star army rules. We played at the Icehouse to make sure we understand the rules and to revise the Jedi force powers. 

The object of the game is for either side to capture the houses during their patrol. This is a play test for an upcoming Cold Wars game.


The Clone troopers advance along the river bed with a Jedi leading the way

The clones blew the initiative rolling a 6, so they got off to a slow start. The Sith start fast moving to gain the advantage.
A second Clone trooper squad moves through a field with another Jedi
The fields slow movement to half the distance of a normal move. Fast moving is different  as you move 10" then roll for each figure for additional movement. This will easily disperse a squad quickly.

A squad of Separatists are following the Sith
The Sith have the same powers as the Jedi which is deflecting shots, force push We are adding force lightning and force choke for the Sith and Healing for the Jedi for now. Other powers to be added later.

The houses are the objective
We wanted to test some of the building rules in the new 5150 SA rules. Unfortunately most of the combat occurred outside.

Movement is slow going and the Clones struggle through the field at 1/2 movement
The insight checks are similar. Squads move into the open as the seen figures halt after 2" and the remaining figures move 2". As the est of the squad comes into view additional insights are taken. I thought the Clones were toast but most of them made it across unscathed.

The Jedi is spotted as he moves with the markers showing the intended movement
The Jedi moves ahead unafraid as the rest of the squad moves in support. The Jedi deflects all of the shots and finishes the move. The Clones get into a fire fight.

A Clone trooper lags as the rest of the squad makes it with only one trooper stunned
A man down, the clones pick up the wounded man who is only stunned and they duck back behind the building. Previous fast movements left one of the Clones behind, and he pays the price for being slothful.

The solitary trooper is hit and left to die
The sole Clone trooper is dropped as the rest of the squad remains in duck back.

The Jedi deflects the shot with double 4's putting the Droid leader OOF
Shooting at a Jedi can be dangerous. The laser blast hits but the Jedi rolled double 4's against his Rep. The shot hits the shooter putting him OOF. We used reaction tests for the Symons when playing out the Droids reaction tests. They seem to fit perfectly. The Clones used the Star Army tables.

 The game was called as the clones were caught in the open. We also ran out of time because we were discussing rules and abilities in between turns. This is turning out to be a promising game.

In addition to abilities we will give the Jedi and Sith Star power. These figures will represent the players so they will be able to cheat death along with other advantages.
 
The clones are trapped as their Jedi is wounded


The game took about two and a half hours. We took out time, researched the rules and played with different abilities. The game will easily play within 2 hours living up to the rules name sake.